阿里妹导读 从
单一职责原则

里式替换原则


依赖倒置原则


接口隔离原则


迪米特法则


开闭原则
-
bad case:修改实现类,在IBook上增加一个方法GetOffPrice() -
good case:通过扩展实现变化,增加一个子类OffNovelBook

工厂方法

class Product { // 抽象产品public:virtual void Method() = 0;};class ConcreteProduct1 : public Product {public:void Method() { cout << "ConcreteProduct1" << endl; }};class ConcreteProduct2 : public Product {public:void Method() { cout << "ConcreteProduct2" << endl; }};class Factory { // 抽象工厂public:virtual Product* CreateProduct() = 0;};class ConcreteFactory1 : public Factory {public:Product* CreateProduct() {return new ConcreteProduct1(); }};class ConcreteFactory2 : public Factory {public:Product* CreateProduct() {return new ConcreteProduct2(); }};int main () {Factory *factory1 = new ConcreteFactory1();Factory *factory2 = new ConcreteFactory2();Product *product1 = factory1->CreateProduct();Product *product2 = factory2->CreateProduct();product1->Method();product2->Method();}
抽象工厂

class AbstractProductA {public:virtual ~AbstractProductA(){};virtual std::string FunctionA() const = 0;};class ProductA1 : public AbstractProductA {public:std::string FunctionA() const override { return "The result of the product A1."; }};class ProductA2 : public AbstractProductA {std::string FunctionA() const override { return "The result of the product A2."; }};class AbstractProductB {public:virtual ~AbstractProductB(){};virtual std::string FunctionB() const = 0;};class ProductB1 : public AbstractProductB {public:std::string FunctionB() const override { return "The result of the product B1."; }};class ProductB2 : public AbstractProductB {public:std::string FunctionB() const override { return "The result of the product B2."; }};class AbstractFactory {public:virtual AbstractProductA *CreateProductA() const = 0;virtual AbstractProductB *CreateProductB() const = 0;};class Factory1 : public AbstractFactory {public:AbstractProductA *CreateProductA() const override { return new ProductA1(); }AbstractProductB *CreateProductB() const override { return new ProductB1(); }};class Factory2 : public AbstractFactory {public:AbstractProductA *CreateProductA() const override { return new ProductA2(); }AbstractProductB *CreateProductB() const override { return new ProductB2(); }};void Client(const AbstractFactory &factory) {const AbstractProductA *productA = factory.CreateProductA();const AbstractProductB *productB = factory.CreateProductB();std::cout << productA->FunctionA() << "n";std::cout << productB->FunctionB() << "n";delete productA;delete productB;}int main() {Factory1 *f1 = new Factory1();Client(*f1);delete f1;Factory2 *f2 = new Factory2();Client(*f2);delete f2;return 0;}
生成器/建造者

class Product1{public:std::vector<std::string> mParts;void ListParts()const{std::cout << "Product parts: ";for (size_t i=0;iif(mParts[i]== mParts.back()){ std::cout << mParts[i];}else{ std::cout << mParts[i] << ", "; }}std::cout << "nn";}};class Builder{public:virtual ~Builder(){}virtual void ProducePartA() const = 0;virtual void ProducePartB() const = 0;virtual void ProducePartC() const = 0;};class ConcreteBuilder1 : public Builder{Product1* mProduct;public:ConcreteBuilder1(){ Reset(); }~ConcreteBuilder1(){ delete mProduct; }void Reset() { mProduct = new Product1(); }void ProducePartA()const override{ this->mProduct->mParts.push_back("PartA1"); }void ProducePartB()const override{ this->mProduct->mParts.push_back("PartB1"); }void ProducePartC()const override{ this->mProduct->mParts.push_back("PartC1"); }Product1* GetProduct() {Product1* result= mProduct;Reset();return result;}};class Director {Builder* mbuilder;public:void set_builder(Builder* builder){ mbuilder = builder; }void BuildMinimalViableProduct(){ mbuilder->ProducePartA(); }void BuildFullFeaturedProduct(){mbuilder->ProducePartA();mbuilder->ProducePartB();mbuilder->ProducePartC();}};void ClientCode(Director& director){ConcreteBuilder1* builder = new ConcreteBuilder1();director.set_builder(builder);std::cout << "Standard basic product:n";director.BuildMinimalViableProduct();Product1* p= builder->GetProduct();p->ListParts();delete p;std::cout << "Standard full featured product:n";director.BuildFullFeaturedProduct();p= builder->GetProduct();p->ListParts();delete p;// Remember, the Builder pattern can be used without a Director class.std::cout << "Custom product:n";builder->ProducePartA();builder->ProducePartC();p=builder->GetProduct();p->ListParts();delete p;delete builder;}int main(){Director* director= new Director();ClientCode(*director);delete director;return 0;}
原型
class Prototype {protected:string mPrototypeName;float mPrototypeField;public:Prototype() {}Prototype(string prototypeName): mPrototypeName(prototypeName) {}virtual ~Prototype() {}virtual Prototype *Clone() const = 0;virtual void Function(float prototype_field) {this->mPrototypeField = prototype_field;std::cout << "Call Function from " << mPrototypeName << " with field : " << prototype_field << std::endl;}};class ConcretePrototype1 : public Prototype {private:float mConcretePrototypeField;public:ConcretePrototype1(string prototypeName, float concretePrototypeField): Prototype(prototypeName), mConcretePrototypeField(concretePrototypeField) {}Prototype *Clone() const override {return new ConcretePrototype1(*this);}};class ConcretePrototype2 : public Prototype {private:float mConcretePrototypeField;public:ConcretePrototype2(string prototypeName, float concretePrototypeField): Prototype(prototypeName), mConcretePrototypeField(concretePrototypeField) {}Prototype *Clone() const override {return new ConcretePrototype2(*this);}};class PrototypeFactory {private:std::unordered_mapstd::hash<int>> mPrototypes;public:PrototypeFactory() {mPrototypes[Type::PROTOTYPE_1] = new ConcretePrototype1("PROTOTYPE_1 ", 50.f);mPrototypes[Type::PROTOTYPE_2] = new ConcretePrototype2("PROTOTYPE_2 ", 60.f);}~PrototypeFactory() {delete mPrototypes[Type::PROTOTYPE_1];delete mPrototypes[Type::PROTOTYPE_2];}Prototype *CreatePrototype(Type type) {return mPrototypes[type]->Clone();}};void Client(PrototypeFactory &prototypeFactory) {std::cout << "Let's create a Prototype 1n";Prototype *prototype = prototypeFactory.CreatePrototype(Type::PROTOTYPE_1);prototype->Function(90);delete prototype;std::cout << "Let's create a Prototype 2 n";prototype = prototypeFactory.CreatePrototype(Type::PROTOTYPE_2);prototype->Function(10);delete prototype;}int main() {PrototypeFactory *prototypeFactory = new PrototypeFactory();Client(*prototypeFactory);delete prototypeFactory;return 0;}

单例
class SingleInstance{public:static SingleInstance* GetInstance();void Print();private:// 构造、析构、拷贝构造和赋值构造均为私有,防止构造多个对象SingleInstance();~SingleInstance();SingleInstance(const SingleInstance &instance);const SingleInstance &operator=(const SingleInstance &instance);static SingleInstance* mInstancePtr;};SingleInstance* SingleInstance::mInstancePtr = nullptr;SingleInstance* SingleInstance::GetInstance(){if (mInstancePtr == nullptr)mInstancePtr = new SingleInstance();return mInstancePtr;}
-
在2/3例模式(一个类能够产生2-3个实例)的情况下,则在私有属性内定义一个类的List,List内包含了所有的实例。
-
在普通类的情况下,想实现单例模式。可以实现一个Manager管理类,Manager类在初始化时生成各个普通类的实例,然后通过GetInstance()统一返回实例。

适配器
class Target { // Target,客户期望的接口,可以使具体或抽象的类,也可以是接口public:virtual void Request() = 0;virtual ~Target(){};};class Adaptee { // 需适配的类public:void SpecificRequest() { cout << "Adaptee" << endl; }};class Adapter : public Target { // 通过内部包装一个Adaptee对象,把源接口转换为目标接口:private:Adaptee* mAdaptee;public:Adapter() { mAdaptee = new Adaptee(); }void Request() { mAdaptee->SpecificRequest(); } // 调用Request()方法会转换成调用adaptee.SpecificRequest()~Adapter() { delete mAdaptee; }};int main() {Target* target = new Adapter();target->Request();delete target;return 0;}
说明:
-
Target:客户期待的接口
-
Adapter:通过在内部包装一个Adaptee对象,把源接口转换成目标接口
-
Adaptee:需要适配的类

桥接/桥梁
class OperationSys{public:OperationSys() {}~OperationSys(){}virtual void SetName() = 0;virtual void OutputName() = 0;protected:std::string mName;};class IOSSystem:public OperationSys{public:IOSSystem() {}~IOSSystem() {}virtual void SetName() { mName = "IOS-SYS"; }virtual void OutputName() { std::cout << "I am IOS,name:" << mName << std::endl; }};class HarmonySystem :public OperationSys{public:HarmonySystem() {}~HarmonySystem() {}virtual void SetName() { mName = "HarmonySystem"; }virtual void OutputName() { std::cout << "I am Harmony operation system,name:" << mName << std::endl; }};class AndroidSystem :public OperationSys{public:AndroidSystem() {}~AndroidSystem() {}virtual void SetName() { mName = "AndroidSystem"; }virtual void OutputName() { std::cout << "I am Android operation system,name:" << mName << std::endl; }};class Phone{public:Phone() {}~Phone(){}virtual void SetName() = 0;virtual void OutputName() = 0;virtual void SetOperation(OperationSys* sys) { mOperSystem = sys; }virtual void OutputSysName() = 0;protected:OperationSys* mOperSystem;std::string mName;};class IPhone :public Phone{public:IPhone() {}~IPhone(){}virtual void SetName() { mName = "IPhone"; }virtual void OutputName() { std::cout << "I am IPhone,Name:" << mName << std::endl; }virtual void SetOperation(OperationSys* sys) { mOperSystem = sys; }virtual void OutputSysName() { mOperSystem->OutputName(); }};class HwPhone :public Phone{public:HwPhone() {}~HwPhone() {}virtual void SetName() { mName = "HuaWeiPhone"; }virtual void OutputName() { std::cout << "I am HuaWei,Name:" << mName << std::endl; }virtual void SetOperation(OperationSys* sys) { mOperSystem = sys; }virtual void OutputSysName() { mOperSystem->OutputName(); }};class MiPhone :public Phone{public:MiPhone() {}~MiPhone() {}virtual void SetName() { mName = "MiPhone"; }virtual void OutputName() { std::cout << "I am XiaoMi,Name:" << mName << std::endl; }virtual void SetOperation(OperationSys* sys) { mOperSystem = sys; }virtual void OutputSysName() { mOperSystem->OutputName(); }};int main(int argc, char* argv[]){IOSSystem* iSys = new IOSSystem();iSys->SetName();IPhone* iPhone = new IPhone();iPhone->SetName();iPhone->SetOperation(iSys);HarmonySystem* hSys = new HarmonySystem();hSys->SetName();HwPhone* wPhone = new HwPhone();wPhone->SetName();wPhone->SetOperation(hSys);AndroidSystem* aSys = new AndroidSystem();aSys->SetName();MiPhone* mPhone = new MiPhone();mPhone->SetName();mPhone->SetOperation(aSys);iPhone->OutputName();iPhone->OutputSysName();wPhone->OutputName();wPhone->OutputSysName();mPhone->OutputName();mPhone->OutputSysName();return 0;}
说明:
-
Abstraction:抽象化角色,主要职责是定义一个角色的行为,同时保存一个对实现化角色的引用,一般为抽象类
-
Implementor:实现化角色,接口或抽象类,定义角色必须的行为和属性
-
RefinedAbstraction:修正抽象化角色,引用实现化角色对抽象化角色进行修正
-
ConcreteImplementor:具体实现化角色,实现接口或抽象类定义的方法和属性


组合
-
希望表示对象的部分-整体层次结构
-
希望用户忽略组合对象与单个对象的不同,用户将统一地使用组合结构中的所有对象
class Component{protected:string mName;public:Component(string name) : mName(name) {}virtual ~Component() {}virtual void Operation() = 0;virtual void Add(Component *com) = 0;virtual void Remove(Component *com) = 0;virtual Component *Getchild(int index) = 0;virtual string GetName() { return mName; }virtual void ShowChilds() = 0;};class Leaf : public Component // 树叶结构{public:Leaf(string name) : Component(name) {}void Operation() { cout << "name : " << mName << endl; }void Add(Component *com) {}void Remove(Component *com) {}Component *GetChild(int index) { return NULL; }void ShowChilds() {}};class Composite : public Component // 树枝结构{private:vector mComponents;public:Composite(string name) : Component(name) {}~Composite(){for (auto &it : mComponents){cout << "---delete" << it->GetName() + "---" << endl;delete it;it = nullptr;}mComponents.clear();}void Operation() { cout << "我是 " << mName << endl; }void Add(Component *com) { mComponents.push_back(com); }void Remove(Component *com){for (auto &it : mComponents){for (auto it = mComponents.begin(); it != mComponents.end(); ++it){if (*it != nullptr && (*it)->GetName() == com->GetName()){delete *it;*it = nullptr;mComponents.erase(it);break;}}}}Component *Getchild(int index){if ((size_t)index > mComponents.size())return nullptr;return mComponents[index - 1];}void ShowChilds(){for (auto it = mComponents.begin(); it != mComponents.end(); ++it){cout << (*it)->GetName() << endl;}}};
说明:
-
Component:抽象构件角色
-
Leaf:叶子构件,遍历的最小单位
-
Composite:树枝构件,组合树枝节点和叶子节点形成一个树形结构

装饰
class Component {public:virtual ~Component() {};virtual void Operate() = 0;};class ConcreteComponent : public Component{public:void Operate() override { cout << "do something" << endl;}};class Decorator : public Component{public:Decorator(Component* component) : mComponent(component) {}void Operate() override{mComponent->Operate();}private:Component* mComponent = nullptr;};class ConcreteDecorator1 : public Decorator {public:ConcreteDecorator1(Component* component) : Decorator(component) {}void Operate() override {method1();Decorator::Operate();}private:void method1() { cout << "method1 修饰" << endl; }};class ConcreteDecorator2 : public Decorator {public:ConcreteDecorator2(Component* component) : Decorator(component) {}void Operate() override {method2();Decorator::Operate();}private:void method2() { cout << "method2 修饰" << endl; }};int main(){Component* component = new ConcreteComponent();component = new ConcreteDecorator1(component);component = new ConcreteDecorator2(component);component->Operate();delete component;}
说明:
-
Component抽象构件
-
ConcreteComponent具体构件,需要装饰的对象
-
Decorator装饰角色,属性中必然有一个private变量指向Component抽象构件
-
具体装饰角色(ConcreteDecoratorA、ConcreteDecoratorB)

外观/门面
class A{public:void DoSomething() { cout << "class A is doing something" << endl; }};class B{public:void DoSomething() { cout << "class B is doing something" << endl; }};class C{public:void DoSomething() { cout << "class C is doing something" << endl; }};class Facade{public:Facade(){a = make_shared();b = make_shared();c = make_shared();}void DoSomething(){a->DoSomething();b->DoSomething();c->DoSomething();}private:shared_ptr a;shared_ptr b;shared_ptr c;};int main(){Facade facade;facade.DoSomething();}
-
Facade门面角色,本角色会将所有从客户端发来的请求委派到相应的子系统去,也就是说该角色没有实际的业务逻辑,只是一个委托类。 -
subsystem子系统角色,子系统并不知道门面的存在,对于子系统而言,门面仅仅是另外一个客户端而已。

享元
class Flyweight{public:// 享元角色必须接受外部状态Flyweight(const string& extrinsic) : mExtrinsic(extrinsic) {}virtual void Operate() = 0;string GetIntrinsic() { return mIntrinsic; }void SetIntrinsic(const string& extrinsic) { mIntrinsic = extrinsic; }protected:const string mExtrinsic; // 外部状态private:string mIntrinsic; // 内部状态};class ConcreteFlyweight1 : public Flyweight{public:ConcreteFlyweight1(const string& extrinsic) : Flyweight(extrinsic) {}void Operate() override { cout << "ConcreteFlyweight1: " << mExtrinsic << endl; }};class ConcreteFlyweight2 : public Flyweight{public:ConcreteFlyweight2(const string& extrinsic) : Flyweight(extrinsic) {}void Operate() override { cout << "ConcreteFlyweight2: " << mExtrinsic << endl; }};class FlyweightFactory{public:static shared_ptr GetFlyweight(const string& extrinsic){shared_ptr flyweight;if (mPool.find(extrinsic) != mPool.end()){flyweight = mPool[extrinsic];}else{flyweight = make_shared(extrinsic);mPool.emplace(extrinsic, flyweight);}return flyweight;}private:static unordered_map<string, shared_ptr> mPool;};unordered_map<string, shared_ptr> FlyweightFactory::mPool{};int main(){FlyweightFactory::GetFlyweight("extrinsic1");FlyweightFactory::GetFlyweight("extrinsic2");shared_ptr flyweight = FlyweightFactory::GetFlyweight("extrinsic2");flyweight->SetIntrinsic("intrinsic2");flyweight->Operate();return 0;}
说明:
-
Flyweight 抽象享元角色,定义对象的外部、内部状态的接口。
-
ConcreteFlyweight 具体享元角色,实现抽象角色定义的业务。
-
unsharedConcreteFlyweight 不可共享的享元角色,不存在外部状态或安全要求(线程安全)不能够使用共享技术的对象,一般不出现在享元工厂中。
-
FlyweightFactory 享元工厂,构造一个池容器,同时提供从池中获得对象的方法。

代理/委托
-
普通代理:客户端只能访问代理角色,而不能访问真实角色 -
强制代理:从真实角色查找到代理角色,不允许直接访问真实角色。
class Subject{public:virtual void Request() = 0;};class RealSubject : public Subject{public:void Request() override { cout << "RealSubject is doing something" << endl;}};class Proxy : public Subject{public:Proxy(Subject* subject) : mSubject(subject) {}void Request() override{Before();mSubject->Request();After();}private:void Before() { cout << "preparing ..." << endl; }void After() { cout << "Finishing ..." << endl; }Subject* mSubject;};int main(){Subject* realSubject = new RealSubject();Proxy proxy(realSubject);proxy.Request();return 0;}
-
Subject 抽象主题角色。 -
RealSubjuect 具体主题角色,业务逻辑的具体执行者。 -
Proxy 代理主题角色(委托类、代理类),负责对真实角色的应用。(也可以在真实角色处理完毕前后做预处理和善后处理工作)

责任链
class Handler{public:virtual ~ Handler() {}void HandleRequest(int32_t requestLevel){if (GetHandlerLevel() == requestLevel){DoSomething();}else{if (mNextHandler){mNextHandler->HandleRequest(requestLevel);}else{cout << "can not find request handler" << endl;}}}void SetNextHandler(Handler* handler){mNextHandler = handler;}virtual int32_t GetHandlerLevel() = 0;virtual void DoSomething() = 0;private:Handler* mNextHandler;};class ConcreteHandler1 : public Handler{public:int32_t GetHandlerLevel() override { return 1; }void DoSomething() override { cout << "ConcreteHandler1 is doing something" << endl;}};class ConcreteHandler2 : public Handler{public:int32_t GetHandlerLevel() override { return 2; }void DoSomething() override { cout << "ConcreteHandler2 is doing something" << endl;}};class ConcreteHandler3 : public Handler{public:int32_t GetHandlerLevel() override { return 3; }void DoSomething() override { cout << "ConcreteHandler3 is doing something" << endl;}};int main(){Handler* handler1 = new ConcreteHandler1();Handler* handler2 = new ConcreteHandler2();Handler* handler3 = new ConcreteHandler3();handler1->SetNextHandler(handler2);handler2->SetNextHandler(handler3);handler1->HandleRequest(4);delete handler1;delete handler2;delete handler3;return 0;}
-
Handler 抽象处理者 -
ConcreteHandler 具体的处理者

命令
class Receiver{public:virtual void DoSomething() = 0;};class ConcreteReceiver1 : public Receiver{public:void DoSomething() override { std::cout << "ConcreteReceiver1 is doing something" << std::endl; }};class ConcreteReceiver2 : public Receiver{public:void DoSomething() override { std::cout << "ConcreteReceiver2 is doing something" << std::endl; }};class Command{public:Command(const std::shared_ptr& receiver) : mReceiver(receiver) {}virtual void Execute() = 0;protected:std::shared_ptr mReceiver;};class ConcreteCommand1 : public Command{public:ConcreteCommand1(const std::shared_ptr& receiver) : Command(receiver) {}void Execute() override { mReceiver->DoSomething(); }};class ConcreteCommand2 : public Command{public:ConcreteCommand2(const std::shared_ptr& receiver) : Command(receiver) {}void Execute() override { mReceiver->DoSomething(); }};class Invoker{public:void SetCommand(const std::shared_ptr& command) { mCommand = command; } void Action() { mCommand->Execute(); }private:std::shared_ptrmCommand; };int main(){std::shared_ptr receiver1(new ConcreteReceiver1());std::shared_ptrcommand1(new ConcreteCommand1(receiver1)); Invoker invoker;invoker.SetCommand(command1);invoker.Action();return 0;}
说明:
-
Receive接收者角色 该角色就是干活的角色,命令传递到这里是应该被执行的。
-
Command命令角色 需要执行的所有命令都在这里声明。
-
Invoker调用者角色 接受命令,并执行命令。

迭代器
中介者
class Mediator;class Colleague{public:Colleague(const shared_ptr& mediator) : mMediator(mediator) {};protected:shared_ptr mMediator;};class ConcreteColleague1 : public Colleague{public:ConcreteColleague1(const shared_ptr& mediator) : Colleague(mediator) {}void SelfMethod() { cout << "ConcreteColleague1 处理自己的业务逻辑" << endl; }void DepMethod() { cout << "ConcreteColleague1 委托中介者处理" << endl; }};class ConcreteColleague2 : public Colleague{public:ConcreteColleague2(const shared_ptr& mediator) : Colleague(mediator) {}void SelfMethod() { cout << "ConcreteColleague2 处理自己的业务逻辑" << endl; }void DepMethod() { cout << "ConcreteColleague2 委托中介者处理" << endl; }};class Mediator{public:shared_ptr GetC1() { return mConcreteColleague1; }void SetC1(const shared_ptr& concreteColleague1) { mConcreteColleague1 = concreteColleague1; }shared_ptr GetC2() { return mConcreteColleague2; }void SetC2(const shared_ptr& concreteColleague2) { mConcreteColleague2 = concreteColleague2; }virtual void DoSomething1()=0;virtual void DoSomething2()=0;protected:shared_ptr mConcreteColleague1;shared_ptr mConcreteColleague2;};class ConcreteMediator : public Mediator{public:void DoSomething1() override{mConcreteColleague1->SelfMethod();mConcreteColleague2->SelfMethod();}void DoSomething2() override{mConcreteColleague2->DepMethod();mConcreteColleague2->DepMethod();}};int main(){shared_ptr mediator(new ConcreteMediator);shared_ptr C1(new ConcreteColleague1(mediator));shared_ptr C2(new ConcreteColleague2(mediator));mediator->SetC1(C1);mediator->SetC2(C2);// 调用中介者的操作mediator->DoSomething1();mediator->DoSomething2();return 0;}
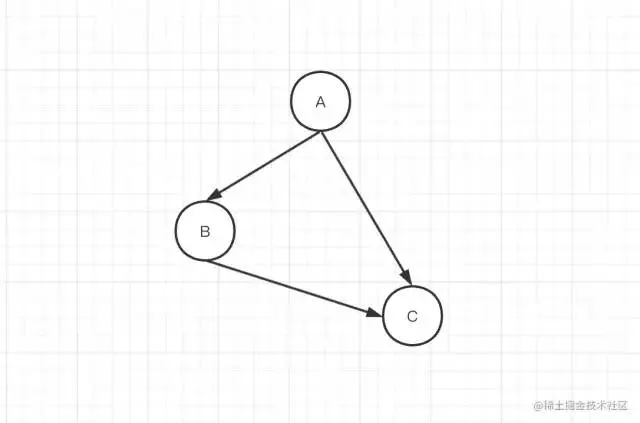
同事类使用构造函数注入中介者,而中介者使用get/set方法注入同事类,是因为同事类必须有中介者,而中介者可以只有部分同事类。
-
Mediator抽象中介者角色 定义统一接口,用于各同事角色之间的通信。
-
Concrete Mediator具体中介者角色 通过协调各同事角色实现协作行为,因此它必须依赖于各个同事角色。
-
Colleague同事角色 每一个同事角色都知道中介者角色,而且与其他同事角色通信时,一定要通过中介者角色协作。

备忘录
class Memento{public:Memento() {}Memento(string state) :mState(state) {}const string& GetState() { return mState; }void SetState(const string& state) { mState = state; }private:string mState;};class Originator{public:const string& GetState() { return mState; }void SetState(const string& state) { mState = state; }Memento CreateMemento() { return Memento(mState); }void Restore(Memento memento) { SetState(memento.GetState()); }private:string mState;};class Caretaker{public:Memento& GetMemento() { return mMemento; }void SetMemento(Memento memento) { mMemento = memento; }private:Memento mMemento;};int main(){Originator originator;originator.SetState("state1");Caretaker caretaker;caretaker.SetMemento(originator.CreateMemento());originator.SetState("state2");originator.Restore(caretaker.GetMemento());cout << "current state: " << originator.GetState() << endl;return 0;}
-
Originator 发起人角色,记录当前内部状态,负责创建恢复备忘录数据
-
Memento 备忘录角色,负责存储Originator发起人对象的内部状态,需要时提供发起人需要的内部状态
-
Caretaker 备忘录管理员角色,对备忘录进行管理、保存和提供备忘录

观察者
class Observer {public:virtual void Update(string &context) = 0;};class Observer1 : public Observer {public:void Update(string &context) override { cout << "observer1 get message: " + context << endl; }};class Observer2 : public Observer {public:void Update(string &context) override { cout << "observer2 get message: " + context << endl; }};class Observable {public:virtual void AddObserver(Observer *observer) = 0;virtual void DeleteObserver(Observer *observer) = 0;virtual void NotifyObserver() = 0;};class Subject : public Observable {public:string GetState() { return mContext; };void SetState(string context) { mContext = context; };void AddObserver(Observer *observer) override { mObserverList.push_back(observer); };void DeleteObserver(Observer *observer)override { mObserverList.remove(observer); };void NotifyObserver() override { for (const auto& it : mObserverList) it->Update(mContext); };private:list mObserverList;string mContext;};void Client() {Subject *subject = new Subject;Observer *observer1 = new Observer1();Observer *observer2 = new Observer2();subject->AddObserver(observer1);subject->AddObserver(observer2);subject->SetState("I'm doing something");subject->NotifyObserver();}int main() {Client();return 0;}
输出:

监听器
状态
class State;class Context{public:Context();void SetState(State* state);State* GetState1();State* GetState2();State* GetState();void Handle1();void Handle2();private:State* mState1;State* mState2;State* mCurrentState;};class State{public:State(Context* context) : mContext(context) {}virtual void Handle1() = 0;virtual void Handle2() = 0;protected:Context* mContext;};class ConcreteState1 : public State{public:ConcreteState1(Context* context) : State(context) {}void Handle1() override { cout << "ConcreteState1 is doing something" << endl; };void Handle2() override{mContext->SetState(mContext->GetState2());}};class ConcreteState2 : public State{public:ConcreteState2(Context* context) : State(context) {}void Handle1() override { cout << "ConcreteState2 is doing something" << endl; };void Handle2() override{mContext->SetState(mContext->GetState1());}};Context::Context() : mState1(new ConcreteState1(this)), mState2(new ConcreteState2(this)), mCurrentState(mState1) {}void Context::SetState(State* state) { mCurrentState = state; }State* Context::GetState1() { return mState1; }State* Context::GetState2() { return mState2; }State* Context::GetState() { return mCurrentState; }void Context::Handle1() { mCurrentState->Handle1(); }void Context::Handle2() { mCurrentState->Handle2(); }int main(){Context context;context.Handle1(); // do somethingcontext.Handle2(); // switch to state 2context.Handle1(); // do somethingcontext.Handle2(); // switch to state 1return 0;}
说明:
-
State 抽象状态角色,负责对象状态定义,并且封装环境角色以实现状态切换
-
ConcreteState 具体状态角色,需实现当前状态下的行为管理以及状态的转变
-
Context 环境角色,负责具体状态的切换

策略
class Strategy{public:virtual void DoSomething() = 0;};class ConcreteStrategy1 : public Strategy{public:void DoSomething() override { cout << "ConcreteStrategy1 is doing something" << endl; }};class ConcreteStrategy2 : public Strategy{public:void DoSomething() override { cout << "ConcreteStrategy2 is doing something" << endl; }};class Context{public:Context(Strategy* strategy) : mStrategy(strategy) {}void DoAnything() { mStrategy->DoSomething(); }private:Strategy* mStrategy;};int main(){Strategy* strategy = new ConcreteStrategy1();Context context(strategy);context.DoAnything();}
说明:
-
Context 封装角色,屏蔽高层模块对策略、算法的直接访问,封装可能存在的变化
-
Strategy 抽象策略角色,策略、算法的抽象
-
ConcreteStrategy 具体策略角色,实现抽象策略中的操作

模板方法
class AbstractClass{public:virtual void DoSomething() = 0;virtual void DoAnything() = 0;void TemplateMethod(){DoSomething();DoAnything();}};class ConcreteClass1 : public AbstractClass{public:void DoSomething() override { cout << "ConcreteClass1 is doing something" << endl; }void DoAnything() override { cout << "ConcreteClass1 is doing anything" << endl; }};class ConcreteClass2 : public AbstractClass{public:void DoSomething() override { cout << "ConcreteClass2 is doing something" << endl; }void DoAnything() override { cout << "ConcreteClass2 is doing anything" << endl; }};int main(){AbstractClass* class1 = new ConcreteClass1();AbstractClass* class2 = new ConcreteClass2();class1->TemplateMethod();class2->TemplateMethod();}
说明:模版方法模式中方法分为两类
-
基本方法,由子类实现 -
模版方法,一个框架实现对基本方法的调度,完成固定的逻辑

访问者
class Visitor;class Element {public:virtual void Accept(Visitor& v) = 0;};class ConcreteElementA : public Element {public:void Accept(Visitor& v) override;void OperationA();};class ConcreteElementB : public Element {public:void Accept(Visitor& v) override;void OperationB();};class Visitor {public:virtual void visit(ConcreteElementA& e) = 0;virtual void visit(ConcreteElementB& e) = 0;};class ConcreteVisitor1 : public Visitor {public:void visit(ConcreteElementA& e) override{cout << "visit ";e.OperationA();cout << endl;}void visit(ConcreteElementB& e) override{cout << "visit ";e.OperationB();cout << endl;}};class ConcreteVisitor2 : public Visitor {public:void visit(ConcreteElementA& e) override{// 访问 ConcreteElementA 的另一个操作cout << "visit ";e.OperationA();cout << " in another way" << endl;}void visit(ConcreteElementB& e) override{// 访问 ConcreteElementB 的另一个操作cout << "visit ";e.OperationB();cout << " in another way" << endl;}};void ConcreteElementA::Accept(Visitor& v) { v.visit(*this); }void ConcreteElementA::OperationA() { cout << "ConcreteElementA"; }void ConcreteElementB::Accept(Visitor& v) { v.visit(*this); }void ConcreteElementB::OperationB() { cout << "ConcreteElementB"; }class ObjectStructure{public:static Element* CreateElement(){if (rand() % 100 > 50){return new ConcreteElementA();}else{return new ConcreteElementB();}}};int main(){ConcreteVisitor1 visitor1;ConcreteVisitor2 visitor2;for (int i=0; i < 10; i++){Element* e = ObjectStructure::CreateElement();e->Accept(visitor1);e->Accept(visitor2);}}
说明:
-
Vistor 抽象访问者,声明访问者可以访问哪些元素
-
ConcreteVistor 具体访问者,影响访问者访问到一个类后该干什么
-
Element 抽象角色,声明接受那一类访问者访问
-
ConcreteElement 具体元素,实现accept方法
-
ObjectStructure 结构对象,元素生产者,一般容纳在多个不同类、接口的容器(vector、map)

参考:
30分钟学会UML类图:https://zhuanlan.zhihu.com/p/109655171
[7]https://blog.51cto.com/u_12279910/4217867#_1
阿里云开发者社区,千万开发者的选择
阿里云开发者社区,百万精品技术内容、千节免费系统课程、丰富的体验场景、活跃的社群活动、行业专家分享交流,欢迎点击【阅读原文】加入我们。
1、本站所有资源均从互联网上收集整理而来,仅供学习交流之用,因此不包含技术服务请大家谅解!
2、本站不提供任何实质性的付费和支付资源,所有需要积分下载的资源均为网站运营赞助费用或者线下劳务费用!
3、本站所有资源仅用于学习及研究使用,您必须在下载后的24小时内删除所下载资源,切勿用于商业用途,否则由此引发的法律纠纷及连带责任本站和发布者概不承担!
4、本站站内提供的所有可下载资源,本站保证未做任何负面改动(不包含修复bug和完善功能等正面优化或二次开发),但本站不保证资源的准确性、安全性和完整性,用户下载后自行斟酌,我们以交流学习为目的,并不是所有的源码都100%无错或无bug!如有链接无法下载、失效或广告,请联系客服处理!
5、本站资源除标明原创外均来自网络整理,版权归原作者或本站特约原创作者所有,如侵犯到您的合法权益,请立即告知本站,本站将及时予与删除并致以最深的歉意!
6、如果您也有好的资源或教程,您可以投稿发布,成功分享后有站币奖励和额外收入!
7、如果您喜欢该资源,请支持官方正版资源,以得到更好的正版服务!
8、请您认真阅读上述内容,注册本站用户或下载本站资源即您同意上述内容!
原文链接:https://www.dandroid.cn/12996,转载请注明出处。


评论0